Traditionally, WordPress manages it’s menu based on Posts in chronological order and Pages in alphabetical order however there has been a way to force the structure for quite some time.
Firstly you should utilise the Parent/Child relationships in the WordPress menu structure and secondly you can establish an order. Using these two features overrides the defaults.
Click the image to view a larger version.
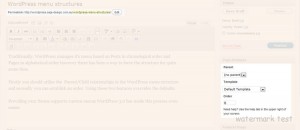
The Permalink denotes the URL of the page we’re creating. For SEO purposes it’s best to have your Permalink settings adjusted to display the name of the page/post in the URL. [we will go over this on the setting page(pending)]
To the right of the post is our Page Attributes area. In here we can select the hirachy of the page and also define the page order if we wish.
As this page is a tutorial we’re going to select “Tutorials” from our parent menu. If your template supports drop down menus this will move the current page to a drop down under the parent. We could also define an order starting from 0 as the first page 1 as the 2nd and so on. You could start at 1 instead of 0 if you wanted or, if you’re planning on writing a lot of pages that will need to be slotted in you could use a higher numbering system (100, 200, 300 if you wanted), the choice is yours.
Perhaps the best thing is that you can change this if you wish. If you look at the Permalink information in the image above you’ll see the URL is currently http://wordpress.seja-design.com.au/wordpress-menu-structures/ but, when we change the attributes and make this a child of Tutorials the Permalink structure will change also. Changing the order number will, naturally, change the order the page sits.
Improvements in WordPress 3
Providing your theme supports custom menus WordPress 3.0 has made this process even easier. Custom menus can be found in your Dashboard > Appearance > Menu
 Custom menus allow you to create menus in a similar way to adding sidebar widgets.
Theme Locations allow you to choose a custom menu. WordPress will use it’s default menu if this is blank.
To create a custom menu click on the + symbol above the menu area on the right hand side and give it a name. This name will now appear in the drop down menu in the Theme Locations box.
Drag and drop the menu items into the right hand menu area, you can move them up and down to position them or drag them to the right to make child menu structures. In the example here we have “cube” and “dumpsolver” sitting under the “renamed” page.
Renamed
Custom menu’s also allow us to rename pages. This is great for SEO purposes or if the page title is too long for the menu. If you look at the example above our Renamed page was initially titled “New Page”
Custom menus can be placed in widget areas as well as the sites primary navigation area. If your template supports footer widgets (new in WordPress 3.0) then you can include a custom navigation structure there too.
These tutorials are only to cover the basics of your WordPress installation. If you wish to find out more then the WordPress home page is a great place to start.

